
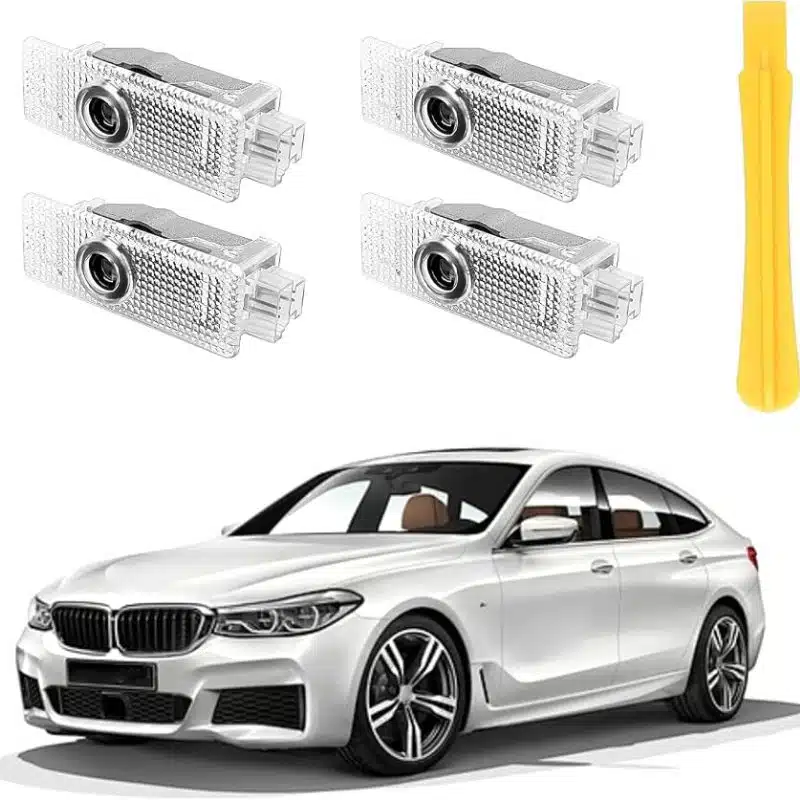
Most car owners need less than 30 minutes to install car door lights totally by themselves. What’s more, they don’t need any special tools or automotive experience. In this guide, we introduce the step-by-step installation process for all three different lights. They are plug-and-play door lights, drill-in lights, and adhesive mount lights. You can find detailed instructions for each step and tips to avoid the most common mistakes. This guide will show you how to install car door lights.
What You Need Before Starting
By following our comprehensive guide on how to install car door lights, you will be able to enhance your vehicle’s aesthetics quickly and easily.
- Your new car door lights (check compatibility with your vehicle before opening the package)
- Flat-head screwdriver or plastic trim tool (plug-and-play method)
- 22mm hole saw drill bit (drill-in method only)
- Isopropyl alcohol wipes (adhesive method)
- Microfibre cloth
- Good lighting — a torch or work light helps a lot
- 15–20 minutes for each installation method
How to Install Car Door Lights: Plug-and-Play Installation
Step 1 — Confirm Your Vehicle Has a Factory Socket
Before you start, you need to open a door and look at the bottom edge of the door panel. If you see a small circular or oval light (even if it does not light up right now), your vehicle has a factory socket and plug-and-play lights are suitable. If you can only see a blank reflector or nothing, you can refer to the drill-in or adhesive method below.
Step 2 — Prepare Your Tools
You can put a soft cloth or microfibre on the ground under the door to protect any dropped parts. Then you should prepare a flat-head screwdriver. If you want to avoid scratching the door panels, a plastic trim removal tool is better than a metal screwdriver. However, a standard flat-head screwdriver that is wrapped with masking tape can also work well.
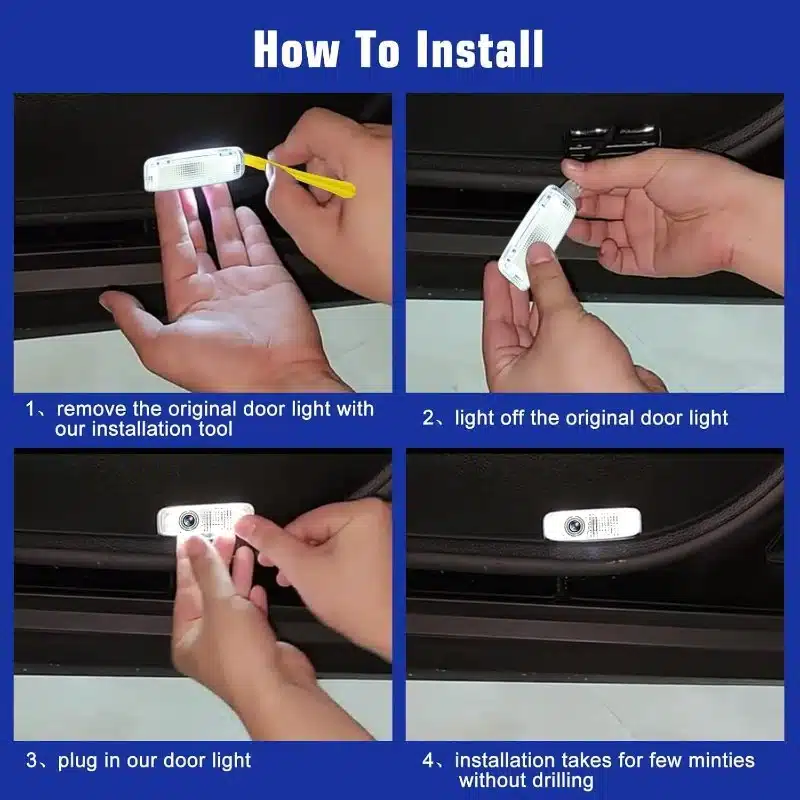
Step 3 — Remove the Factory Car Door Lights
Now you can insert the screwdriver into the small notch at the side of the factory light. You should use gentle twisting pressure to release the plastic retaining clips. In fact, the unit will pop out with little resistance. If it resists strongly, you can try the other side. It is important not to force it because the factory clips break easily. Moreover, you can hardly find replacements for the clips.
Step 4 — Disconnect the Electrical Connector
After you loosen the factory light unit, you will find a small rectangular electrical connector on it. There is a release tab on the top or side of the connector housing. You need to press it and pull the connector straight back at the same time. Also, it should be released with light force. At last, you can put away the factory light in case you want to install it back one day.
Step 5 — Connect the New Car Door Lights
Now you can take out your new aftermarket car door lights. At first, you should align the connector with the vehicle-side socket. The connector is keyed so it can only be inserted in one way. Then you should push firmly until you hear or feel a click. If the lights don’t work after installation, the most common reason is that the connector was not fully inserted.
Step 6 — Test the Light
You should test the light before you click it into the door panel. When you close the door almost fully or cover the light sensor with your hand, the light should turn on. But if you open the door fully or uncover the sensor, it should turn off. If it does not turn off, you need to check whether the connector is fully seated.
Step 7 — Seat the Unit in the Door Panel
First, you should align the new car door lights with the door panel cutout. Moreover, the unit should align perfectly with the factory aperture. Then you should press firmly and evenly until all retaining clips engage. Finally, the unit should sit flush with the door panel surface with no gaps.
Step 8 — Repeat for All Doors
At last, you can repeat steps 3–7 for each door. Most vehicles have four car door lights and one for each door. Since you are familiar with the clip release process now, you will finish installing for the other doors more quickly. It usually takes about 15–20 minutes in total to install for all four doors.
Step-by-Step: Adhesive Mount Installation
Step 1 — Clean the Mounting Surface
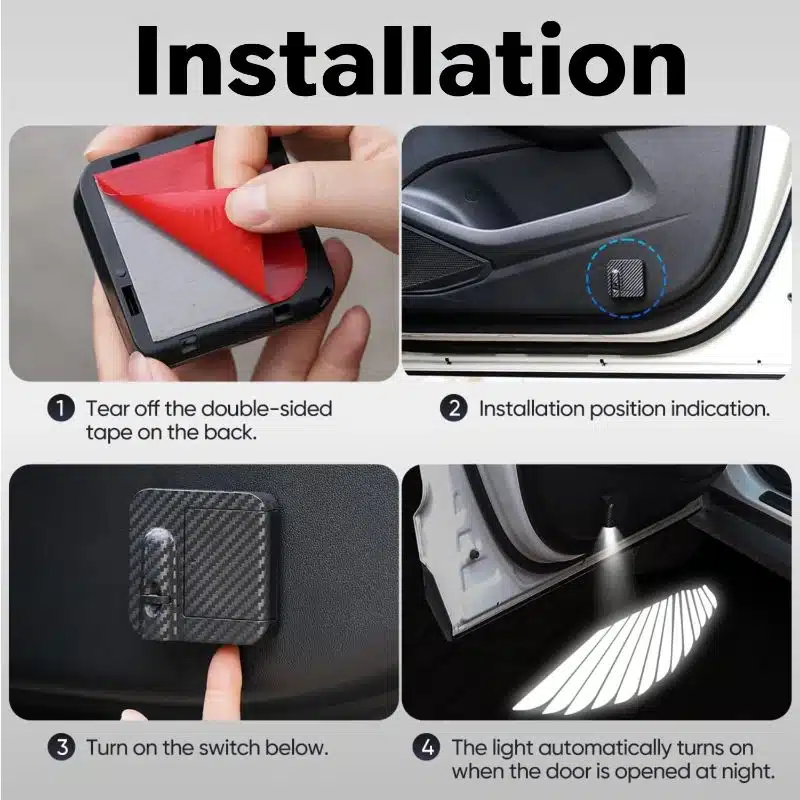
In the beginning, you need to clean the underside of the door panel or mirror housing with an isopropyl alcohol wipe. In this way, you can remove all wax, oil, and road waste. Then you should wait for 2 minutes because the surface must be fully dry before you carry out the next steps.
Step 2 — Position and Test
You can hold the light unit against the mounting surface in the selected position. If the light has a test button, you can turn it on and confirm that the light can project directly on the ground. For the best effect, the light should project directly downward and slightly forward to illuminate the step-out area.
Step 3 — Apply and Press
Now you can peel off the 3M adhesive backing from the light unit. Then, you should press the unit firmly against the mounting surface and hold for 30–60 seconds. After that, you can apply even pressure across the full surface. This is because 3M adhesive requires enough pressure to achieve full bond strength.
Step 4 — Allow Curing Time
After installation, you must not wash the vehicle or drive in heavy rain for at least 24 hours. In fact, 3M adhesive will reach full strength after 24–72 hours. After curing, the bond is secure and can withstand any weather.
Troubleshooting After Installation
- Light does not turn on: you can check if the connector is fully inserted or if the sensor is covered by the door panel
- Light stays on in daylight: the infrared sensor may be blocked by the door panel; you can adjust the unit slightly
- Projection is blurry: the lens may have a protective film; you need to remove it before installation
- Unit is loose in the panel: you can gently press all four corners to ensure all clips are engaged
Summary
In all, it is easy for any car owner who is good at DIY to install car door lights step-by-step. For the plug-and-play lights, you only need a screwdriver and 5 minutes to install on one door. For the adhesive method, the light is suitable for any vehicle, and you don’t need extra tools. All you should do is follow each step carefully, especially the connector click-in and the test before installation. After that, your new lights will work perfectly for the first use.